Gua Sha: What is it, Benefits and How To
Gua Sha: An Ancient Beauty Ritual for Radiant Skin and Muscle Relief
Gua sha has taken the beauty and wellness world by storm, but this technique is far from a passing trend. Rooted in Traditional Chinese Medicine (TCM), gua sha has been used for centuries to promote circulation, relieve tension, and support overall health. Originally practiced on the body, it was later adapted into a gentler form for the face, where it is now a go-to tool for sculpting, de-puffing, and enhancing skin radiance.
Whether you’re looking to improve your complexion, relieve sore muscles, or simply indulge in a little self-care, gua sha is a versatile and effective technique worth incorporating into your routine. This guide covers everything you need to know—including how it works, its benefits, risks, and how to use it properly to get the best results.
The Origins of Gua Sha: From Body Therapy to Facial Rejuvenation
Gua sha has been practiced for over 700 years as a healing method in Traditional Chinese Medicine (TCM). The original technique was designed for the body, where practitioners used a smooth-edged tool—traditionally made of jade, horn, or stone—to scrape the skin in firm strokes. This process helped increase circulation, break up stagnation in energy (qi), and relieve muscle pain. It was often used on the back, shoulders, neck, and limbs to help with chronic pain, fever, and inflammation by stimulating blood flow and supporting the body’s natural detoxification processes.
Over time, gua sha was adapted for facial use, with a much lighter and more refined approach. Unlike body gua sha, which can result in redness and bruising due to deep pressure, facial gua sha involves gentle, upward strokes to support lymphatic drainage, reduce puffiness, relieve facial tension, and enhance skin elasticity. This adaptation became a cornerstone of holistic beauty routines, celebrated for its ability to naturally contour the face, boost circulation, and improve skin tone.
While the body and facial techniques differ in intensity, both work by stimulating blood flow, promoting relaxation, and encouraging overall wellness. Whether you’re using it for muscle recovery or skin rejuvenation, gua sha delivers impressive results.
Benefits of Gua Sha: Why You Should Try It
For the Face
Gua sha has become a must-have tool in skincare for its instant and long-term benefits. Here’s why:
- Reduces Puffiness & Improves Lymphatic Drainage – The gentle scraping motion helps flush out excess fluid and toxins, minimizing under-eye bags and bloating.
- Boosts Circulation & Skin Radiance – By stimulating blood flow, gua sha delivers oxygen and nutrients to skin cells, enhancing the skin’s natural glow.
- Stimulates Collagen Production – Regular use can help improve skin elasticity, promoting a firmer, more youthful appearance.
- Sculpting and Lifting – Over time, regular gua sha sessions can help lift sagging skin, particularly in areas like the jawline and cheekbones. It can also help define the contours of the face, creating a more sculpted and youthful appearance.
- Relieves Facial Muscle Tension – If you experience jaw clenching, tension headaches, or forehead tightness, gua sha can help relax and ease stress-related muscle tightness.
- Helps with Sinus Congestion – Many people find that gua sha, especially along the nose and cheeks, can help relieve nasal congestion and sinus pressure.
For the Body
Body gua sha is commonly used by massage therapists, acupuncturists, and physical therapists for its deep healing benefits. Here’s how it can help:
- Eases Muscle Soreness & Tension – The scraping motion works on deeper layers of tissue, breaking up adhesions and relieving pain.
- Encourages Detoxification – By stimulating lymphatic drainage, gua sha helps rid the body of toxins and excess fluid buildup.
- Promotes Circulation & Recovery – Athletes and active individuals use gua sha to increase blood flow and speed up muscle recovery after workouts.
- Reduces Inflammation – Studies suggest that gua sha may help alleviate symptoms of chronic pain conditions such as fibromyalgia, arthritis, or back pain.
Are There Any Risks?
Gua sha is generally safe when done correctly, but there are a few precautions to keep in mind:
- Excessive pressure can cause bruising – Body gua sha may result in temporary redness or slight bruising, which is normal, but overuse can damage capillaries and cause unnecessary irritation.
- Avoid using gua sha on broken or irritated skin – This includes acne, eczema, sunburn, or active rashes, as scraping can worsen irritation.
- Check with a professional if you have a medical condition – If you have bleeding disorders, take blood thinners, or have fragile skin, consult a healthcare provider before using gua sha.
How to Perform Gua Sha at Home
Performing gua sha at home is easy, but it’s important to use the correct technique, angle, and pressure for optimal results. Follow these step-by-step instructions to get the most out of your gua sha practice.
Gua Sha basics:
- Start with Clean Skin & Oil – Apply a hydrating facial oil or serum to allow the gua sha tool to glide smoothly. This prevents unnecessary tugging on the skin.
- Hold the Tool at a 15- to 30-Degree Angle – The edge of the gua sha should be nearly flat against your skin, not perpendicular, to create a gentle scraping motion.
- Use Gentle, Upward Strokes – Always move outward and upward, starting at the neck, then moving to the jawline, cheeks, and forehead. Apply light to medium pressure.
- Repeat Each Stroke 5-10 Times – Consistency is key! Use long, sweeping motions rather than short, abrupt strokes.
- Finish with Hydration – Apply a moisturizer or serum to lock in hydration and enhance the benefits of your gua sha session.
How to Use Gua Sha for the Face
Step 1: Start with the Neck
- Position the Tool: Using your dominate hand, hold the tool with the flat side against the skin, just below the collarbone, and your non dominate hand holding the skin at your collarbone.
- Scraping Motion: Gently scrape upward from the neck towards the hairline or jaw in long, smooth strokes until you reach the hairline on the side and back of your neck and under your jaw for the front of your neck. Each time you reach the top of the motion (hairline or jaw), give the tool a gentle wiggle to release lymph from the lymph glands.
- Repetition: Repeat the movement 3-5 times before moving to the next area.
Step 2: Move to the Jawline
- Position the Tool: Using your dominate hand, hold the tool with the W side against the skin, in the center of your chin on the jawline, and your non dominate hand holding the skin next to the tool to hold the skin taut.
- Scraping Motion: Gently scrape following the jawline from the chin to the ear in long, smooth strokes until you reach the space between the jaw and the ear. Each time you reach the top of the motion (hairline or ear), give the tool a gentle wiggle to release lymph from the lymph glands. Pro tip: As you scrape outward you can move it slightly upward for more lift.
- Repetition: Repeat the movement 3-5 times before moving to the other side of the jaw.
Step 3: Move to the Cheeks and Cheekbones
- Position the Tool: Using your dominate hand, hold the tool with the W side against the skin, close to your nose, and your non dominate fingers next to your nose.
- Scraping Motion: Gently scrape the tool outward and upward along the cheekbones, following the natural contour of your face. Using long, smooth strokes until you reach the hairline by the temple. Each time you reach the top of the motion (hairline by temple), give the tool a gentle wiggle to release lymph from the lymph glands.
- Repetition: Repeat 3-5 times, gradually increasing the pressure as you move towards the temples. Repeat on the other side of the face.
Step 4: Focus on the Under-Eye Area
The under-eye area can be delicate, so use the lightest pressure.
- Position the Tool: Using your dominate hand, hold the tool with the V or pointed side against the skin, close to the inner corner of your under eye, and your non dominate fingers next to inner under eye, closest to your nose.
- Scraping Motion: Gently glide the tool outward toward the temple, following the natural curve of the orbital bone under the eye. Each time you complete the motion, give the tool a gentle wiggle to release lymph.
- Repetition: Repeat this motion 3-5 times on both sides.
Step 5: Move to the Eyebrows
- Position the Tool: Using your dominate hand, hold the tool with the W side against the skin, close to the inside of the brow, and your non dominate fingers between your brows.
- Scraping Motion: Gently glide the tool outward toward the temple, following the natural curve of the orbital bone above the eye. Pro tip: As you reach the outside of the eye, you can glive the tool upward and outward for more lift. Each time you complete the motion, give the tool a gentle wiggle to release lymph.
- Repetition: Repeat this motion 3-5 times on both sides.
Step 6: Move to the Forehead
- Position the Tool: Using your dominate hand, hold the tool with the concave side against the skin, just below the brow, and your non dominate fingers holding your eyelid closed.
- Scraping Motion: Move the tool upward towards your hairline, using smooth, upward strokes. For horizontal lines, scrape in small, vertical strokes to release tension. With each motion, give the tool a gentle wiggle at the hairline to release lymph.
- Repetition: Repeat this motion 3-5 times on both sides.
Advanced Pro Tip:
To incorporate muscle toning, add microcurrent to your gua sha practice. For this, you need a metal gua sha tool and a microcurrent device, preferably one that has the gloves attachment.
Microcurrent with gloves: Put latex gloves on and then the microcurrent gloves. Dip gloves in distilled water for conductivity. With the microcurrent machine on “erase” setting, follow the instructions above holding the metal gua sha tool in your dominate hand, and non dominate hand placement to complete the circuit.
Microcurrent with electrodes: You will need conductivity gel with electrodes. Attach an electrode to the metal gua sha and the other electrode to your skin, out of the way from the treatment area. This will complete the circuit for the microcurrent to work. Apply conductivity gel. Follow the instructions above.
How to Use Gua Sha for the Body
Step-by-Step Guide
- Apply a Body Oil or Lotion – This helps reduce friction and ensures smooth gliding over the skin.
- Use Firmer Pressure than for the Face – The goal is to stimulate circulation, break up muscle adhesions, and release tension.
- Scrape in Long, Even Strokes – Move in the direction of lymphatic drainage (toward the heart) to aid detoxification and blood flow.
- Focus on Areas of Tension – Spend extra time on sore muscles, knots, or areas with stiffness, but avoid bruising by not over-scraping one area.
- Expect Temporary Redness – Unlike facial gua sha, redness or slight bruising on the body is normal and a sign of increased blood circulation.
How Often Should You Do Gua Sha?
- Face: 3-5 times per week for optimal lymphatic drainage and skin benefits.
- Body: As needed, especially after workouts or to relieve chronic muscle tension.
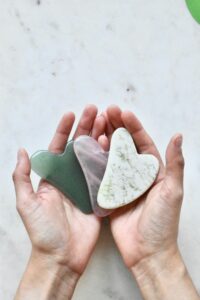
Tools mentioned for Gua Sha:
Jade Gua Sha: https://amzn.to/3QZQ1un
Stainless Steel Gua Sha: https://amzn.to/41KeRn2
Microcurrent Myolift Mini or Myolift QT: https://7ewellness.com/bestbeautyhacks
Articles on the science and benefits of microcurrent:
https://bestbeautyhacks.com/the-science-behind-microcurrent/
https://bestbeautyhacks.com/benefits-of-microcurrent/
https://bestbeautyhacks.com/best-professional-grade-microcurrent-devices-for-at-home-use/
Gua sha is more than just a beauty trend—it’s a time-tested practice that supports both inner and outer wellness. Whether you’re using it to sculpt and refresh your face or to relieve muscle tension in your body, this ancient technique offers a natural, effective way to boost circulation, reduce stress, and enhance your self-care routine.
For best results, pair gua sha with proper hydration, a nutrient-rich diet, and a consistent skincare routine. Want to maximize your results? Try keeping your gua sha tool in the fridge for an extra cooling effect on the skin.
Have you try gua sha for your face, body, or both? Let us know in the comments!
Was this article helpful?
*Disclaimer: This post is not intended to provide diagnosis, treatment or medical advice. Content provided is for information purposes only. Please consult with a physician or other healthcare professional regarding any medical or skin related diagnosis or treatment options. The statements made about specific products throughout this blog are not to diagnose, treat, cure or prevent disease. It is important that you check labels to determine if a product is right for you. Before starting any treatment at home consult a health care or skin care professional to determine if it’s right for you.
*Disclosure: some links may be affiliate links where I may get a small commission at no additional cost to you.